Published on 2023-09-05
How to set up eSIM on iPhone - A Comprehensive Guide
We will guide you through the step-by-step process of configuring and activating an eSIM on your iPhone. Apple has emerged as a prominent tech giant since 2018, mainly known for its eSIM-enabled cellular devices. The iPhone has become a favorite among travelers because it can effortlesly alternate between cellular data plans made possible by eSIM technology.
Digital SIM technology is gaining traction and has become the primary cellular service technology for various devices, including the iPhone 14, which exclusively supports eSIM.
Consequently, many telecommunications companies integrate virtual SIMs into their services, resulting in a growing number of international eSIM carriers. Now, let's delve into the main subject of this article. You might be curious about what an eSIM is, how it functions on iPhones, which iPhone models support eSIM, and how to set it up. In this article, we will explore these inquiries and additional ones.
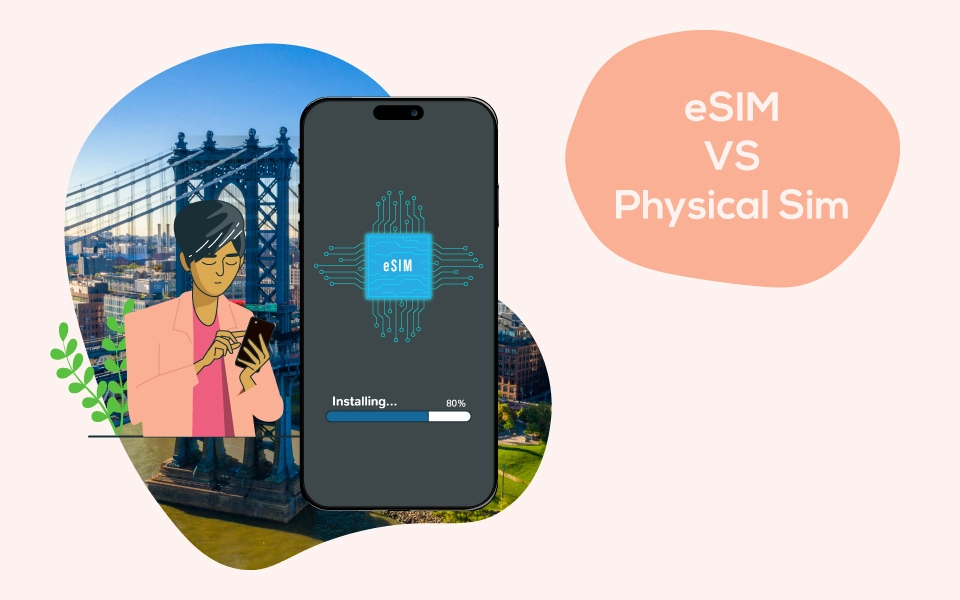
What is an eSIM?
An eSIM, short for electronic SIM, is a digital SIM card that enables you to subscribe to a cellular data plan from your local mobile service provider or an international one without needing a conventional physical SIM card. This functionality is made possible through a tiny chip integrated into your Apple device, activated upon downloading and adding a virtual SIM plan.
The appeal of eSIMs has grown significantly due to their adaptability, as they can be employed across various devices, including laptops, smartwatches, and even automobiles!
The United States boasts one of the highest iPhone user populations globally, and many of its iPhone models are adopting eSIM technology. Consequently, it becomes crucial to understand where you can purchase an eSIM tailored for use in the USA with your iPhone and grasp its operational mechanism.
How does eSIM work on the iPhone?
The eSIM functionality on iPhone devices operates in the same manner as it does on other eSIM-compatible devices. Inside each iPhone, an embedded chip allows you to download and install your Digital SIM card once you purchase it from either your local mobile operator or an international eSIM provider. Below, you will find instructions on installing and activating your eSIM if you own an iPhone that supports virtual SIMs.
Which iPhones use eSIM?
Regarding the paragraph above, it's worth noting that not all iPhones have eSIM functionality. While the majority of newer iPhone models support eSIM, there are still some older smartphones that need this technology.
Here is a list of iPhones that are compatible with eSIM:
- iPhone XR
- iPhone XS
- iPhone XS Max
- iPhone 11
- iPhone 11 Pro
- iPhone SE 2 (2020)
- iPhone 12
- iPhone 12 Mini
- iPhone 12 Pro
- iPhone 12 Pro Max
- iPhone 13
- iPhone 13 Mini
- iPhone 13 Pro
- iPhone 13 Pro Max
- iPhone SE 3 (2022)
- iPhone 14
- iPhone 14 Plus
- iPhone 14 Pro
- iPhone 14 Pro Max
These iPhone models offer support for eSIM functionality.
How many eSIMs iPhones can have?
For most iPhone models that are compatible with virtual SIM cards, you can store up to 20 eSIMs, but when it comes to active usage, you can utilize either one eSIM or two Digital SIMs simultaneously. The capacity varies based on the specific iPhone model you own. However, in many iPhones, you can employ both your physical traditional SIM card and a virtual SIM concurrently, a functionality commonly referred to as Dual SIM.
What is a Dual SIM card?
Dual SIM functionality allows you to simultaneously utilize a physical nano-SIM (the traditional type) and an eSIM (virtual card), enabling you to access data and make and receive calls using both SIMs. This is the typical operation in many iPhone models. However, with the introduction of the iPhone 14, which lacks a physical SIM slot, you now can employ two eSIMs concurrently.
How to set up eSIM on iPhone
If you're considering purchasing an eSIM or already have one but need clarification on the setup process, you've come to the right place! We'll guide you through a step-by-step procedure for installing and activating your Virtual SIM.
What's required:
- An iPhone that supports eSIM functionality
- Either a QR code or an app provided by an eSIM carrier.
What steps should you take?
Various methods exist to configure and activate your eSIM on an iPhone, but the QR code method is the most prevalent. Let's explore two approaches you can use to set up your eSIM. Remember that the process may vary based on your iPhone model and the iOS version you're currently using.
How to set up eSIM on iPhone - Step by Step
To set up your eSIM using the QR code provided by your network operator, follow these steps:
- Open your device settings.
- Navigate to the "Mobile" or "Cellular Data" section.
- Look for the option to "Add eSIM" and select it.
- Please ensure that the QR code provided by your mobile carrier is centered within the camera frame.
- Capture an image of the QR code using your device's camera.
- Once you receive the "Cellular Plan Detection" notification, click "Continue."
- Finally, confirm by tapping "Done."
- Proceed by tapping "Continue" again.
- Select which line you want to set as the default line, and click "Continue."
- Choose the cellular line you want to use as the primary line for iMessage and tap "Continue."
- Next, select the line you intend to use for cellular data and tap "Continue."
- After completing these steps, your eSIM will be successfully set up and ready for use, visible within your device settings.
How to set up eSIM on iPhone - Manual Activation
- Open your device's settings.
- Navigate to the Mobile or Cellular Data section.
- Select the option to Add an eSIM.
- Choose to Use the QR code provided or Enter the details manually.
- If entering details manually, you will need the SM-DP+ address and the activation code for the eSIM.
- Tap Next.
- When you receive a notification indicating that the Cellular Plan has been detected, click Continue.
- Tap Done.
- Continue by tapping the option labeled "Continue."
- Choose which line you want to set as your default line and tap Continue.
- Select the line you want to use as the primary line for iMessage, then tap Continue.
- Pick the bar you intend to use for cellular data.
- Tap Continue.
- Your virtual SIM is now ready to use and can be found in your device's settings.
Remember!
- Using the Double SIM: If you wish to take advantage of the dual SIM capability, meaning you'd like to have two separate phone numbers on one device, it's essential to confirm that your iPhone is unlocked, meaning it's not restricted to a single network provider. This flexibility allows you to utilize two numbers from distinct service providers.
- Use multiple eSIMs: You cannot operate various eSIMs simultaneously. To switch between eSIMs, navigate to Settings, select Mobile/Cellular data, choose your desired plan, and click the option to Activate this line.
- Rename eSIMs: You can rename each eSIM to distinguish them from one another. To modify the name, access Settings, navigate to Mobile/Cellular data, select the eSIM, click the Data plan label, and choose a new name.
- Remove an eSIM from an iPhone: Access your Settings, go to Mobile/Cellular data, select the plan you wish to remove, and then click on the option to Delete your data plan. It's important to note that deleting the eSIM from your phone doesn't automatically cancel your data plan, so we strongly advise contacting your data provider beforehand.
- These eSIMs are entirely virtual, allowing you to purchase them online or at physical operator stores. In either scenario, you'll receive them instantly.
Conclusion
In conclusion, understanding "How to set up eSIM on iPhone" is essential for flexible mobile connectivity. With eSIM technology supported in various iPhone models, the process is accessible and user-friendly. Whether you're switching carriers, traveling internationally, or seeking dual SIM functionality, eSIMs offer versatile solutions. To set up your eSIM, follow the steps outlined in this guide, ensuring a seamless and convenient experience.
Embrace this innovative feature, which empowers you to stay connected wherever you go. Whether you own an iPhone 12, iPhone 13, or the latest iPhone 14, use the eSIM feature to expand your connectivity options. Following this comprehensive guide, you can quickly and confidently configure your eSIM and enjoy the benefits of a virtual SIM card on your iPhone. Stay connected, stay flexible, and enjoy eSIM technology's convenience to your mobile experience.
FAQ - How to set up eSIM on iPhone
Where can you locate the eSIM feature on an iPhone?
To view your eSIMs, navigate to the Settings app and tap "Cellular."
Can an eSIM function on an iPhone that is locked?
If your iPhone is carrier-locked, you can still utilize an eSIM exclusively with your existing mobile service provider.
Can I exclusively use eSIM on my iPhone?
If you own an eSIM-compatible iPhone, you can utilize a virtual SIM as your primary line, eliminating the need for a physical SIM card.
How can you move your eSIM to a new iPhone?
With the introduction of iOS 16, you can transfer your eSIM from your previous iPhone to your new one using Quick Transfer. Navigate to the "Settings" menu, select "Mobile/Cellular Data," choose "Add eSIM," and then opt for "Transfer from Nearby iPhone." Please ensure that both devices run iOS 16 or later for this process to work.